I've seen these wooden DIY Growth Rulers all over Pinterest and have been wanting to make one for years. And when I say years, I'm talking about way back before I had my third child who is now 7. Anyway, I finally got around to making one last week and it was easier than I thought. I had all of the supplies on hand (except for the stain, I thought I had some but couldn't find it so I did have to buy that). I'm so pleased with how it turned out. I'm loving the dark wood with the white letters and numbers.
I plan to go back through my doctor appointment records and write in the heights for the kids at various ages. I'm going to record their height by age rather than by date. We can compare how tall each child was at a certain age rather than trying to do the math and figure out how old a child is at a particular date. I haven't gotten around to that part yet. Hopefully it won't take me another 7 years.
As for how I made this DIY Growth Ruler, I started out by sanding a 1" x 6" x 6' board.
Next I applied some Minwax pre-stain wood conditioner. It 'helps soft woods absorb stain evenly.' I don't know if my board is a soft wood or not but since I had the wood conditioner on had I figured I'd go ahead and use it. I used a sponge brush to apply it and it was like painting it with water.
After the wood conditioner dried, I put on the stain. I used Minwax Wood Finish Penetrating Stain in a red mahogany color. Again, I used a sponge brush to apply it. Since I wanted my board dark, I left it on for 15 minutes before wiping it off.
Once it was dry, I brought it into my garage where it stayed for a few days until I could decide what I wanted to do about the numbers and lines. I finally decided to use a paint pen for the lines and vinyl for the numbers and words at the top. I was going to use vinyl for the lines but a paint pen just seemed easier.
I used a tape measure and pencil to mark off every inch. Using a square to make sure everything was straight and level, I went over it with a white Sharpie paint pen. I made the lines varying lengths like you'd see on a ruler.
Next up, I added the vinyl for the numbers and words.
There are various sayings I could have used but I liked this one best. Other contenders were "Our Growing Family", or our last name with initial behind it like THIS ONE or THIS ONE.
I drilled a hole in the back and hung it on the wall 8" above the floor, making sure the 1 foot line really was 1 foot off the floor. I hung it that high for three reasons. 1 - We have tall baseboards and I didn't want it right on top of the baseboard. 2 - I already had a picture there and I wanted the top of the Growth Ruler and the top of the picture to line up. 3 - We are a tall family so I wanted to make sure we could measure up to 6'6". Oh, and I also used some of those Command Velcro strips to further secure it to the wall so it wouldn't move.
In trying to decide where to hang it, I didn't have a whole lot of choices. I couldn't hang it in the upstairs hallway between the kids bedrooms because of vent and light switch placements. So that pretty much left the kitchen. This is the entrance to the kitchen where we are always coming and going.
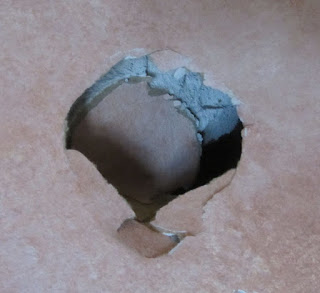
It's the perfect spot and I love how it looks there, especially since it's now hiding this:
Yeah, that's a fist sized hole in the wall thanks to my teenage son. In all fairness he didn't do it on purpose. I mean he did hit the wall on purpose but it was with an open palm like a slap and he didn't intend to punch a hole. We refer to it like it's a piece of art and call it "Teenage Boy Meets Wall."
However, since we don't have any of the kitchen paint leftover (it was painted like that when we moved in), we have yet to fix it. I'm glad to have found a way to cover it up.
OK, back to my cute Growth Ruler.
Here's my little guy pointing to his number. He turned 3 recently and is happy to let people know about it.
Subscribe to CONTROLLING Craziness and get my blog updates via email. Don't miss anymore posts, click HERE to get email updates.


