I try to keep most of my fall decor holiday neutral so it can be used for Halloween and Thanksgiving. I made these cute wooden pumpkins and they've been sitting on my mantle for almost a month. I finally got around to finishing them off so now I can show them to you.
I started off making 3 pumpkins each painted a different fall color. The yellow pumpkin didn't look good next to the other two pumpkins so I left it out. I found the 'joyful thankful blessed' sign (it's actually a magnet) at Hobby Lobby and the colors and size worked great with my set of two pumpkins so I added that to the mix for a Thanksgiving look.
After the pumpkin blocks were painted, I drilled holes in the top and added a branch. Then I cut up some fabric and tied it around the branch for a leafy effect. The process of making these is similar to how I made the wooden firecrackers for 4th of July. You can read all about that HERE.
The pumpkins look great together, but you could also use them on their own. And the solid orange pumpkin could have a jack o lantern face painted on the other side for Halloween. Maybe I'll do that next year since I didn't think of it soon enough for this year's Halloween.
Here's what else is on the mantel. It's a work in progress and every year I hope to add a little more thanks to shopping those after holiday sales.
Here's a close up of the acorns my older daughter painted and glued to a branch. I mentioned them in my last post HERE.
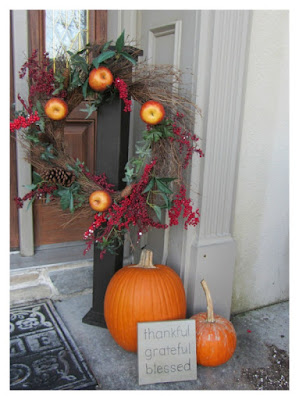
And here's the front porch. I removed the two carved pumpkins and put up my "Thankful, Grateful, Blessed" sign that I made a couple of years ago. I'm amazed it's help up so well and still looks new. To find out how I made that you can check out THIS POST. Ignore the dirt in the picture. That's what happens when you try to plant with a toddler helping you.
Subscribe to CONTROLLING Craziness and get my blog updates via email. Don't miss anymore posts, click HERE to get email updates.


