Click below to shop amazon and support my blog. Thank you!

Showing posts with label kid's craft. Show all posts

Tuesday, May 7, 2019

FREE Fun for Kids


Free Fun, sign me up!
Did you know that certain stores have FREE kids activities on Saturday mornings?  Check your local stores for times and availability.  Here are the ones I know about, plus some summer freebies at the end of the post.


JCPenney has a Kids Club where they host a free craft once a month.  This month is making a Mother's Day card and next month is a Father's Day frame. 


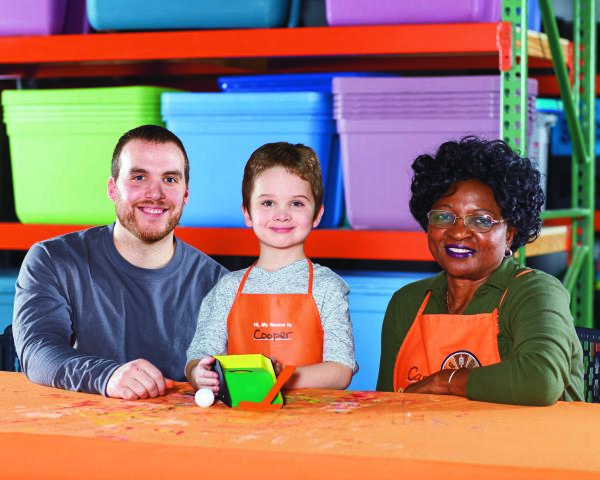
The Home Depot has workshops for kids and adults.  The kids activities are Saturday mornings, but the DIY workshops for adults vary.  


Lowes has a Build and Grow workshop for kids.  This Saturday they are making a chalkboard planter and next month is a birdfeeder.


Michaels also has a Kids Club as well as other family craft, spring break and camp craft activities.  Although not every craft is free.  

Michaels


More freebies to look forward to this summer are:


Subscribe to CONTROLLING Craziness and get my blog updates via email.   Don't miss anymore posts, click HERE to get email updates.

And don't forget to follow me on FacebookTwitterGoogle+, and Pinterest.

Thursday, January 17, 2019

Minnie Mouse Crochet Purse


My teenage daughter is so creative and crafty.  Remember how she carved/decorated her Halloween pumpkin HERE?  Well, she learned to crochet last year and has made a few things besides hats and scarves.  She doesn't even follow a pattern.  She knows some basic stitches and when she sees something she likes, she just starts making it.  

And that is exactly what she did with this Minnie Mouse purse.  


Her 2 year old cousin loves Minnie Mouse so she made this for her as a Christmas gift.  Good thing my daughter got some yarn as an early Christmas present.  


She found her inspiration on Pinterest HERE.

And just so her cousin's baby brother wouldn't feel left out, my daughter crocheted him a hat.

If you're wondering about those brightly colored baby toys, they are THE perfect baby gifts.  You can find them HERE and HERE.  They will keeps babies entertained at home and on the go.  Perfect to stash in your purse or leave in the car or stroller.  Oh, and older kids like them too.  My 4 and 8 year old kept playing with them after I bought them, so I had to quickly gift wrap them.


Subscribe to CONTROLLING Craziness and get my blog updates via email.   Don't miss anymore posts, click HERE to get email updates.

And don't forget to follow me on FacebookTwitterGoogle+, and Pinterest.


Friday, October 26, 2018

Corny Halloween Card


It's been a while since I've blogged.  Life has been busy.  We moved from PA to upstate NY in August.  The kids are adjusting better than expected to their new schools and the new house is mostly unpacked and settled in.  I even took some time to do something crafty.  My inspiration came this:


It's actually a paper bag, but I thought it would make a cute card.  I'm thinking it would be a cute wooden decor item too, just use some Mod Podge to glue the papers onto wood.  Check out Little Paper Sprinkles to see her other ideas.

Anyway, this is pretty much self explanatory just by looking at it but I'll walk you through how I made it.

1.  Cut paper to size. 

2.  Glue smaller papers to card.

3.  Draw face

4.  I used my finger and some paint, to put a small dab on for the rosy cheeks.

5.  I used some black tulle to make a bow and glued that on.  
I also added a 'corny' saying on the back and a "Happy Halloween".
Then slipped it in an envelope to mail off to my kids cousins.

Cute, quick and easy - that's my kind of craft project.    

What Halloween crafts have you made recently?  


Subscribe to CONTROLLING Craziness and get my blog updates via email.   Don't miss anymore posts, click HERE to get email updates.
And don't forget to follow me on FacebookTwitterGoogle+, and Pinterest.

Wednesday, February 14, 2018

Loads of Love


Here's a simple Valentines craft for the kiddos.  
Just cut out a truck silhouette, glue to paper and add some heart stickers.  


I used my Silhouette cameo for this but it would be easy enough to draw freehand or print out from your computer.


I actually had it framed on a shelf in my son's room (you can see it in the picture below) but now he'd rather have Batman, so I'm slowing switching out some of his decor. 


My son was able to add the heart stickers himself and I wrote the cute saying on it. 


Now it's ready to give to his Valentine.  And just who is the lucky lady.  Well, that would be his cousin.  They are about 1.5 years apart and ever since she was born, my son has had a special bond with her, always trying to hold her and protect her.

Image may contain: one or more people and child


Happy Valentine's Day


Subscribe to CONTROLLING Craziness and get my blog updates via email.   Don't miss anymore posts, click HERE to get email updates.

And don't forget to follow me on FacebookTwitterGoogle+, and Pinterest.

Tuesday, February 13, 2018

Valentine Cards for Cousins

Our kids have several cousins that live far away.  We try to keep in touch but it's hard to make phone calls with different time zones and different schedules/activities going on.  Email/text/messaging is OK, but the little ones aren't able to do that.  So I like to send mail.  I know it's old fashioned, but what kid doesn't love to get mail. 

We made these cards the other day to show our cousins some love.  I mostly use my Silhouette Cameo to cut out vinyl.  You can check out some of those projects HERE, HERE and HERE.  This time I used it to cut out card stock and made a card with it.  I feel like I've opened up a whole new world of possibilities now. 


P.S.
I found the 'Love' image HERE.


Subscribe to CONTROLLING Craziness and get my blog updates via email.   Don't miss anymore posts, click HERE to get email updates.

And don't forget to follow me on FacebookTwitterGoogle+, and Pinterest.

Thursday, December 14, 2017

Christmas Crafts

Our Elementary PTO is great.  They have lots of activities planned throughout the year and most are for the whole family not just the elementary student.  One night last week they had a family Christmas craft activity.  There were 10 different craft stations set up for the kids.  We were able to do 8 of them in about an hour.  They were all easy to make and my 7 year old daughter had a blast making them with very little help from me.


This snowman craft was easy to do and didn't take much time since all the pieces were cut out and ready to go.  Just glue the snowman head and body to the blue paper, then glue on the scarf and carrot nose.  Using a black marker, add eyes and a mouth then paint on some snowflakes using white craft paint and a Q-tip.  And there you have a cute little snowman with some falling snow.

Next up was this jolly little elf.  All my daughter had to do was color, cut and assemble with brads/split pins.  The pattern was from Red Ted Art

This snowman cup was another super easy one.  Put the silver pipe cleaner through the cup, glue on the red ear muffs and carrot nose.  Finish it off using a black marker to make the eyes and mouth.  How cute would this be for a Christmas party filled with candy favors.

This fingerprint tree would make a cute Christmas card.  All it took was some red and green ink, a gold star and brown marker for the tree trunk.

Beaded snowflake
  The silver pipe cleaners were already made to form a snowflake so all my daughter had to do was add the beads and bend the ends.  Then we added a hook so we could hang it on the Christmas tree.

Craft stick Rudolf
  All we had to do for this was to glue on the antlers, eyes and nose.  I think hot glue would have worked better.  The craft glue made things slip around a bit until they dried. 

Twig and Ribbon Tree Ornament
I thought this craft was so cute, I made one myself.  All we had to do was tie scraps of fabric around a twig.

Cork Santa
This one took a little longer because we had to wait for the paint to dry, but other than that it was easy.  The bottom half of the cork was painted red.  A cotton ball was glued on as a beard.  Using a black marker my daughter added eyes and a nose.  There was a Hershey Kiss glued on top of the cork for a hat and then the small cotton ball glued onto that.  However, my daughter couldn't resist and ate the Hershey Kiss.  I'm sure you can imagine what it looks like though.


My daughter also had an ornament making day at school so check back next week to see more Christmas craft ideas.


Subscribe to CONTROLLING Craziness and get my blog updates via email.   Don't miss anymore posts, click HERE to get email updates.


Tuesday, September 5, 2017

Moving Fish

This summer went by way too fast.  Between vacations, camps and summer school, we were definitely busier than in previous years.  I loved it though, and am a little sad to see it come to an end. But, they must go back to school.  I can't believe it's the second week of school already.  Granted last week and this week are just 4 day weeks for them, but I'm glad they (and I) can ease back into our new routine.

The other day, I saw this video on how to make a moving fish.  It looked easy, so we just had to try it.  krokotak.com has all kinds of cute paper crafts for kids to make, be sure to check it out for yourself.


The video and pictures at that link show each step in creating this moving fish, so I'll just show you our finished product.  I made these with my 2, 6 and 12 year olds.  Of course I helped my 2 year old cut and glue but he wasn't very interested in making it.  My 6 year old tried to do it herself and got frustrated.  But my 12 year old was able to complete it on her own.  She enjoyed making it more than playing with it, whereas my 2 year old loved playing with it.  Later that day we went out and he had to wear it on his hand during the car ride.  So I'd say this craft is more for older kids to make and younger kids to play with.  


They were pretty easy to make and didn't take too long either.  You could do all sorts of colors and shapes of fins, making an entire school of fish.


And speaking of fish, check out this whooper my little guy caught while on vacation.


Subscribe to CONTROLLING Craziness and get my blog updates via email.   Don't miss anymore posts, click HERE to get email updates.

Tuesday, July 11, 2017

DIY Pencil Sharpener


Right after school let out, we took a little vacation to Williamsburg, VA.  It was about a 4 hour car ride and my older daughter loves to pass the time reading or drawing.  With hours to doodle in the car, she knew she'd have to sharpen her pencil several times.  We have lots of those cheap pencil sharpeners but no sharpeners that contain the shavings.  So, being the creative genius that she is, she came up with a way to keep all her pencil sharpening shavings from filling up the car.  She thought of this idea and put it together all by herself.  She didn't even search Pinterest, but if you want to see a video of the process, you can check out this Pin.


Supplies used:

Pencil sharpener
Empty tic tac container
Hot glue gun

All she did was hot glue the pencil sharpener into the tic tac container.

That's it.  It only takes a few seconds and now you have a way to contain your pencil shavings. 


You can use this while traveling, for school, or drawing at home in your bed late at night when you should be sleeping (yeah, my daughter does that).


Subscribe to CONTROLLING Craziness and get my blog updates via email.   Don't miss anymore posts, click HERE to get email updates.

And don't forget to follow me on FacebookTwitterGoogle+, and Pinterest.