Click below to shop amazon and support my blog. Thank you!

Showing posts with label outside. Show all posts

Wednesday, August 2, 2017

DIY Cinder Block Umbrella Stand

I've been slowly but surely updating my patio and making it more kid friendly.  When I created the Kids Rock Garden, I knew it would needed to be shaded.  Adding an umbrella next to that area would certainly provide shade and since we already have an umbrella at our patio table, I just bought the same color for the kids play area.   Next up was to find just the right umbrella stand. I wanted it sturdy but didn't want to pay the $50+ price tags for the options out there.  That lead me to see if there was a cheaper yet sturdier DIY option.  Of course there was and it only cost $6.21!


In the past,we've had a couple of those offset cantilever umbrellas.  Below is a picture of one from amazon for a really good price, but I wouldn't buy one again because we haven't had much luck with them.
I like them because they are out of the way and the kids can have shade without running into an umbrella.  Over the past 10 years we've lived here I think we've gotten three because they keep braking due to the wind.  So, I knew I didn't want one of those again.  Since this umbrella would be in the flower bed I wouldn't have to worry about kids running into it, but I still needed to make sure it would withstand the winds that blow across the fields behind our house.  

I got my inspiration from Sara over at Pot Belly Bird HERE.  She lives in Chicago and has a rooftop patio so she needed an umbrella stand that could stand up to the windy city.  She went the extra step and added flowers to her cinder block umbrella stand.  One of these days I might get around to doing that.


This set up seemed like the perfect thing for my area and oh so easy to make.  I couldn't wait to get started but first I had to find the cinder blocks.  I thought I could just get them from Lowes or Home Depot.  And while they both had the regular 8x8x16 hollow cinder blocks, they did not have any 8x8x8 hollow cinder blocks.  They wouldn't do site to store with free shipping and I didn't feel like driving two hours to the nearest store which had them in stock.  I almost thought about abandoning this DIY project, but then I remembered we have a local building supply company about 20 minutes away.  I called and yes, they had exactly what I needed and better yet, it was cheaper than the other stores.  I purchased 2 of the 8x8x16 hollow cinder blocks and 3 of the 8x8x8 hollow cinder blocks for a grand total of $6.21.   


First up was to make a level base for the cinder blocks to set on.  I just used one of the concrete pavers that was used to weigh down the base of our old cantilever umbrella.


I layed down the 8x8x16 cinder block first, then added the 8x8x8 cinder block next to it.  I added the other 8x8x16 cinder block on top of the 8x8x8 block and half of the 8x8x16 block.


Then I added the remaining two 8x8x8 blocks on top of that, making sure they all lined up.


Then I placed my umbrella pole inside and filled around it with some rocks I had left over from the Kids Rock Garden project.


I wiggled the umbrella pole and everything felt nice and sturdy.  No fear of this thing getting blown over.


What a cute shady spot for my son to play in.


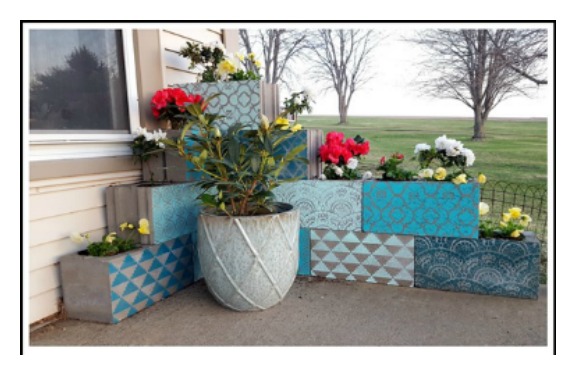
 And if I wanted to fancy up those plain ol' cinder blocks, I could always paint them like Bethany from Reality Day Dream did HERE.  The colors she used would even match my umbrella.


Be sure to check out my other patio updates:


Subscribe to CONTROLLING Craziness and get my blog updates via email.   Don't miss anymore posts, click HERE to get email updates.

Monday, July 24, 2017

Kids Rock Garden

Earlier this summer, I converted a small portion of my flower bed into a rock garden for my two year old to play in.  


We have this large patio out back and with a grill and picnic table at one end, and some play toys for the kids at the other.  There's a little play house and a water table so I thought I'd add a rock garden to that side as well. 


My two year old son loves to play with rocks.  He likes to scoop them up and move them from one pile to another.  I'm all for getting kids to play outside, so I decided to make him his very own rock garden.


I took a little section of the flower bed that surrounds our patio and laid down some paper so weeds wouldn't grow up through the rocks. 


Not sure if that would prevent weeds, I also laid some black plastic (actually it was a garbage bag) on top of the paper.  And I didn't like the 2x4 wood edges so I swapped them out for some large rocks we happened to have laying around outside.  


Since I wanted my son to be able to scoop up the rocks, I thought I'd get some small rocks to fill up that area.  I did buy some small rocks but they weren't small enough for scooping with his kid sized plastic shovels.  That's when I decided to use aquarium gravel.  Walmart had this bright purple color on clearance for $1 a bag, so that's what we got.  I used 4 five pound bags for my space.  


I surrounded the purple gravel with the small rocks and added a board so he could drive his cars.


It's cute and colorful and he does like to play in there.  The only issue is that the gravel doesn't stay in the rock garden.  Nothing that a broom can't fix though.


I also noticed that he mostly plays in the front of the rock garden since that's where he sits and his arms can't reach to the back of it where the retaining wall pavers are.  So I moved all the purple gravel to the front and filled in the back with the small rocks.  Now he has more gravel to dig through and as he gets older he has another section to play in.  


I even painted the board to make it look like a road for his cars, although his favorite thing to do is to scoop the rocks into various cups and containers.  I'm also thinking about getting some little plastic dinosaurs to add to the mix.  


It's been a fun little area for him to play in.  


This isn't the only kid friendly upgrade to our patio.  
Check out the Flower Bed Tot Spot I created earlier this spring.


Subscribe to CONTROLLING Craziness and get my blog updates via email.   Don't miss anymore posts, click HERE to get email updates.


And don't forget to follow me on FacebookTwitterGoogle+, and Pinterest.

Wednesday, May 31, 2017

Flower Bed Tot Spot

I'm such a fair weather worker.  First it was too cold to work outside, then it was too hot.  Last week, the temperature was in the 70's, just right to finally tackle some yard work.  

We have this flower bed in one corner of our patio and a couple of years ago our butterfly bush died which left this spot bare.  Well, it wasn't bare for long because it quickly became overgrown with weeds.  I didn't know what to do with it so I just left it.  Finally last summer, I tackled the weeds and laid some mulch but still didn't know what to plant there.  

Anyway, last week I finally figured out what to do.  I've been wanting to make our patio more kid friendly so the kids will play outside longer.  I had this old toddler bench that looked out of place next to the adult sized table and chairs on the patio, so I thought why not make a cute little tot spot in the flower bed.


First up was to do the remaining weeding.  My little guy decided it was more fun to help me than to ride his bike.  I'm not one to turn down free help, so I let him work.


Then I laid down the mulch.  I actually bought several bags of mulch from Lowes when it was on sale, that was over a month ago, and now I finally am getting around to using them.  Then I laid down the pavers.  The pavers I had sitting atop the base to our cantilever umbrella.  The umbrella broke last year and so these pavers were no longer needed.  Glad I could finally put them to good use.  The bench went on top of the pavers and I placed a potted tree behind the bench.  The tree started out as a sapling 2 years ago, it's a wonder that thing is still alive.  It looks good in this spot and the terra cotta colored pot matches the color of the pavers too.


I had my little guy test out the spot and soon realized, he needed a place to put his feet....


...so I added a little paver in the front...


...and now it's perfect.


Oh, and that big blue pinwheel does a nice job of hiding our utility line.


All in all, I'm pleased with this little tot spot.  I had all the items on hand and the mulch was the only thing I had purchased.  At $2 a bag, and I think I used 4 bags, it was an inexpensive upgrade for the patio.


Subscribe to CONTROLLING Craziness and get my blog updates via email.   Don't miss anymore posts, click HERE to get email updates.


And don't forget to follow me on FacebookTwitterGoogle+, and Pinterest.

Monday, May 15, 2017

Customizing Your Grill and THE BEST Marinade Recipe

Hope you all had a wonderful Mother's Day.  My whole weekend was wonderful thanks to my amazing husband.  He took the boys for most of the day Saturday which left me with time to organize, something I can't do with a toddler around.  I even had time to read a book.  Seriously, I could get used to this.  On Sunday my oldest daughter made me (and everyone else) breakfast.  My husband gave a heart warming talk about mothers in church and then we visited with family.  The weather was perfect,  not too hot and not to chilly.  We got to eat outside and watch the kids play.  Life is good, very, very good.  

Speaking of warmer weather and eating outside, I love to cook on the grill.  It just adds more flavor to your meats.  But not all grills are made the same.  What if your grill doesn't come with a convenient place to store your grill accessories such as the tongs, spatula and grill brush?  Whether you want to store them outside all summer, or just while you are cooking on the grill, we've come up with a quick and easy solution. 

We just used a Dremel to create slots for those accessories to hang from.    


In no time at all my handy hubby made three slots to store those grilling utensils.


We usually keep our grilling stuff inside but when we are cooking, it's handy to have it right where we need it.  No more sitting them on the grill and getting it dirty. 


We love to cook chicken on the grill and have THE BEST marinade recipe.  
It tastes great on burgers too.  Usually when we make it, we don't even measure out the ingredients and it turns out great no matter what.

Here's the recipe so you can try it out yourselves.  Happy Grilling!


THE BEST Marinade Recipe:

1/2 cup vegetable oil
1 tsp garlic salt
3/4 cup soy sauce
1/4 cup Worcestershire sauce
2 tbsp mustard
1 tbsp black pepper
1/2 cup vinegar
1 1/2 tsp dried parsley 
1/3 cup lemon juice


Subscribe to CONTROLLING Craziness and get my blog updates via email.   Don't miss anymore posts, click HERE to get email updates.


And don't forget to follow me on FacebookTwitterGoogle+, and Pinterest.

Thursday, April 6, 2017

The Best Patio Furniture EVER!

I think it's finally feeling like spring around here and that means spending more time outside.  I'm slowing starting to spruce up our patio and make it look fun and inviting.  A couple of years ago I found a great deal on some patio furniture that I absolutely love.  It's been one of the best investments we've made.  We were lucky enough to score this set of 6 chairs and a table on craigslist for only $900.  Considering the cheapest chairs I could find were $150, that price is a steal.  And since it's made out of poly wood, it still looks new and that's really saying something since our patio is very exposed to the elements such as the wind and sun.  Add in the fact that we don't do anything to maintain it and hardly ever clean it unless there's been a spill and that makes it ...
the best patio furniture ever!


Our backyard is on the south side of our house so it gets all the sun all day long.  Anything out there gets faded.  The yard and surrounding areas next to it are flat and it can get pretty windy.  So whatever is out there has to be pretty sturdy or it will fly off the patio and into our neighbor's yard.  Case in point, last month we had some strong winds and they blew our playhouse into our flower beds.  This is actually our 2nd playhouse.  Years ago, wind blew our playhouse to pieces.  It came apart and we never did find one of the roof pieces so we had to get rid of the entire thing.  Luckily our latest playhouse has yet to meet it's windy demise. 


This is not our first patio set.  We had a smaller one with four chairs and that would blow away in strong winds too.  I'd have to stack the chairs and line it all along the side of the house to prevent it from blowing into our neighbors yard.  This set here is not going anywhere.  I love that I don't have to worry about it moving much less getting blown away during strong winds.  But what I really love is that it's maintenance free.  I'm busy with four kids, I don't have time to be sanding and painting picnic tables when they get weathered.  This poly wood is great.  I don't have to worry about paint chips, splintered wood or fading colors.


Here are some more shots of my patio furniture.  Seriously, if you are in the market for a new patio set, I can't recommend this type highly enough.  It's more money than the wood kind, but the fact that it's maintenance free and will last a lifetime makes up for it.


I mentioned that we found ours on craigslist which was a rare find.  However if you are local and looking for a good deal on poly wood furniture, this is the cheapest place I know of:


No, I'm not being compensated in any way for this post, just sharing what I love and a good deal.


Subscribe to CONTROLLING Craziness and get my blog updates via email.   Don't miss anymore posts, click HERE to get email updates.


And don't forget to follow me on FacebookTwitterGoogle+, and Pinterest.