Click below to shop amazon and support my blog. Thank you!

Showing posts with label summer. Show all posts

Monday, July 1, 2019

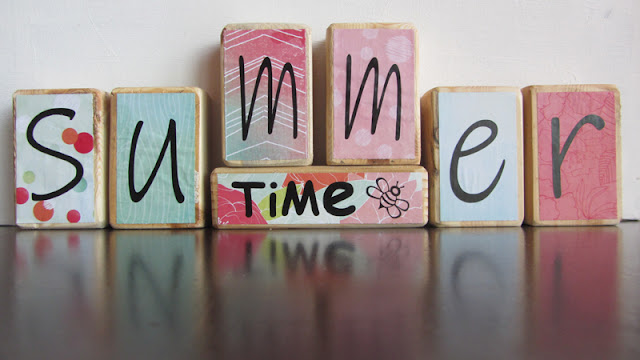
DIY Reversible Summer / 4th of July Blocks


We  had a craft day at church the other weekend and I was in charge of this craft.  Perfect for a summer time display.  It is super cute and super easy to make.


You need 7 blocks.  I think we had 2x4's cut into the following sizes (you don't have to be exact):
6 blocks cut to 2.5" by 4"
and 1 block cut at 2" by 6"


The blocks were sanded and left as is for our project, but you could stain or paint them if you wanted.

Then we used patriotic and summer colored scrapbook paper cut to fit inside the blocks.  6 patriotic colored papers and 6 summer colored papers were cut to 2 1/8th" by 3.5".  One patriotic paper and one summer paper was cut to 1 3/8" by 5.5".  

Vinyl lettering was cut out using my Silhouette machine and applied to each paper.

Then the paper was Mod Podged to the blocks.  I just applied Mod Podge to the block and then smoothed the paper on top.  You could also apply Mod Podge over the paper for a more durable or shinier finish.


I love a 2 for 1 decoration.  I have mine turned to summer right now but when July rolls around, I'll flip it to the patriotic side and then flip it back to summer to use until school starts.


The idea was found HERE and the possibilities are endless.  You could make these for Easter/Spring, Winter/Valentine's Day, or any holiday and season.  I love a simple, easy and versatile craft. 


Subscribe to CONTROLLING Craziness and get my blog updates via email.   Don't miss anymore posts, click HERE to get email updates.

And don't forget to follow me on FacebookTwitterGoogle+, and Pinterest.

Wednesday, June 20, 2018

Ice Play on a Hot Day

It's been a while since my last post and a lot has happened which has been keeping me busy.  We are moving to New York!!!  My husband took a new job and has been working there for just over a month.  We should settle on our new house in the next week or two and the movers are packing up our current home in 3 weeks.  I'll have to fill you in on what we did to get our current house ready to sell, as well as what the new house looks like.  As for today, I'm sharing how I'm keeping my kids busy on these hot summer days.  Bonus - it also keeps them out of the house and since we haven't sold it, I'm trying to keep it clean and 'show ready' all the time.  

A couple days ago I froze some dinosaurs and other plastic animals in a few small containers we had.  My youngest two (ages 7 and 3) loved trying to melt the ice to get the animals out.  


Then a few neighborhood kids came over to play and had fun with the ice.  


So the next day I decided to do it again but this time, I made it even bigger.


I froze the ice in layers, adding in more animals with each layer.


The kids had a blast trying to chisel and dig out the animals.


It kept them busy for over an hour.


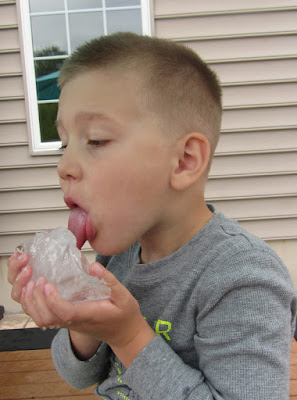
Some of the kids enjoyed licking the ice too.


My teenage son couldn't resist joining in the fun and broke off chunks for the younger kids to play with.


Then he had fun throwing ice chunks into the yard.


It was so much fun just playing with the ice, my teenage son made his own ice block for the next day.


If you've been following this blog for a few years, you may remember that I posted about something similar (Ice Eggs) a few years ago.  Those are fun too, but this method is easier and you can make huge blocks of ice with the right containers.  You can experiment with different containers too.  We used a plastic cup to get this cylindrical shape.


Subscribe to CONTROLLING Craziness and get my blog updates via email.   Don't miss anymore posts, click HERE to get email updates.

And don't forget to follow me on FacebookTwitterGoogle+, and Pinterest.

Monday, July 24, 2017

Kids Rock Garden

Earlier this summer, I converted a small portion of my flower bed into a rock garden for my two year old to play in.  


We have this large patio out back and with a grill and picnic table at one end, and some play toys for the kids at the other.  There's a little play house and a water table so I thought I'd add a rock garden to that side as well. 


My two year old son loves to play with rocks.  He likes to scoop them up and move them from one pile to another.  I'm all for getting kids to play outside, so I decided to make him his very own rock garden.


I took a little section of the flower bed that surrounds our patio and laid down some paper so weeds wouldn't grow up through the rocks. 


Not sure if that would prevent weeds, I also laid some black plastic (actually it was a garbage bag) on top of the paper.  And I didn't like the 2x4 wood edges so I swapped them out for some large rocks we happened to have laying around outside.  


Since I wanted my son to be able to scoop up the rocks, I thought I'd get some small rocks to fill up that area.  I did buy some small rocks but they weren't small enough for scooping with his kid sized plastic shovels.  That's when I decided to use aquarium gravel.  Walmart had this bright purple color on clearance for $1 a bag, so that's what we got.  I used 4 five pound bags for my space.  


I surrounded the purple gravel with the small rocks and added a board so he could drive his cars.


It's cute and colorful and he does like to play in there.  The only issue is that the gravel doesn't stay in the rock garden.  Nothing that a broom can't fix though.


I also noticed that he mostly plays in the front of the rock garden since that's where he sits and his arms can't reach to the back of it where the retaining wall pavers are.  So I moved all the purple gravel to the front and filled in the back with the small rocks.  Now he has more gravel to dig through and as he gets older he has another section to play in.  


I even painted the board to make it look like a road for his cars, although his favorite thing to do is to scoop the rocks into various cups and containers.  I'm also thinking about getting some little plastic dinosaurs to add to the mix.  


It's been a fun little area for him to play in.  


This isn't the only kid friendly upgrade to our patio.  
Check out the Flower Bed Tot Spot I created earlier this spring.


Subscribe to CONTROLLING Craziness and get my blog updates via email.   Don't miss anymore posts, click HERE to get email updates.


And don't forget to follow me on FacebookTwitterGoogle+, and Pinterest.

Wednesday, June 7, 2017

Last Day of School 2017

Last day of school!  Of course I'm excited to be able to sleep in, but what I'm really looking forward to is having the older kids home so they can watch the younger two and I can finally do some shopping - alone.

To celebrate this momentous occasion, my little helper and I made a banner to place over the front door.  

Then we decorated the bus stop with balloons and bunting.

I wrote things on the balloons like "welcome summer" and "happy last day of school" not knowing it would look upside down.  Next year, I'll do it right.


Here is my youngest daughter who is no longer a kindergartner.  


I didn't make it down to the bus stop in time to see my older daughter.  Good thing my camera has a zoom function.


My daughter and her best friend walking home together.  These girls have known each other since they were two and now they're 7th graders.


They were kind enough to humor me with one more picture before we went in the house to eat ice cream.


I had various toppings set out for them and let them have at it, making whatever kind of ice cream creation they wanted.  


My original idea also included having buckets of water and super soakers at the bus stop so when the girls got off the bus, we'd squirt them.  However, it was a chilly and drizzly day, so I'm going to have to postpone that until next year.  

And in case you're wondering what we've done in previous years, check out this post HERE.


Subscribe to CONTROLLING Craziness and get my blog updates via email.   Don't miss anymore posts, click HERE to get email updates.

And don't forget to follow me on FacebookTwitterGoogle+, and Pinterest.

Friday, June 2, 2017

End of School Year Traditions

I can't believe the last day of school is almost here.  I've been looking forward to not having to wake up early, make lunches and get the kids out the door on time since Christmas break ended.  I know the summer will fly by and a new school year will be here before I know it, so I gotta make the most of this summer, starting with something fun to celebrate the last day of school and kick off the start of summer. 


Here is how we celebrated the last day of school in previous years with banners, balloons, ice cream, and more.


Yes, a Welcome to Summer 2016 post is missing and I don't have any pictures other than this sign that my kids helped me make.  

I think I also used sidewalk chalk at the bus stop, to say Happy Last Day of School, but maybe I did that for the First Day of School, I can't recall which.  And I can't remember what else we did, if anything.  I've got to redeem myself this year so I need to start planning something good.  I'm thinking I should have done the same thing every year so I wouldn't have to come up with something new each time.  So if you have any good ideas, send them my way.

Here are a few ideas I found on Pinterest that I may use.  

If you pick up your kids, fill your car with balloons.  
Now that would be a fun ride home.  
Check out Be Different Act Normal's blog for more details.

Decorate your door, yard and car.
Find more info at Mama Cheaps blog.

Have a water balloon or Nerf gun battle set up and ready to go when they get home.
You can find more info on those ideas HERE and HERE. 


Gifts are always a hit.  I try to get the kids something like a fun summer toy or new book.  This mom put together a bucket full of summer fun.  Find out more over at Bits of Everything.


The end of the school year also means a break from all that paperwork.
Check out how I store and organize my kid's schoolwork.  
I've been using this method for several years and it's working great.  
Click HERE to find out my system and to create one of your own.


Subscribe to CONTROLLING Craziness and get my blog updates via email.   Don't miss anymore posts, click HERE to get email updates.

And don't forget to follow me on FacebookTwitterGoogle+, and Pinterest.