Click below to shop amazon and support my blog. Thank you!

Showing posts with label flower beds. Show all posts

Wednesday, August 2, 2017

DIY Cinder Block Umbrella Stand

I've been slowly but surely updating my patio and making it more kid friendly.  When I created the Kids Rock Garden, I knew it would needed to be shaded.  Adding an umbrella next to that area would certainly provide shade and since we already have an umbrella at our patio table, I just bought the same color for the kids play area.   Next up was to find just the right umbrella stand. I wanted it sturdy but didn't want to pay the $50+ price tags for the options out there.  That lead me to see if there was a cheaper yet sturdier DIY option.  Of course there was and it only cost $6.21!


In the past,we've had a couple of those offset cantilever umbrellas.  Below is a picture of one from amazon for a really good price, but I wouldn't buy one again because we haven't had much luck with them.
I like them because they are out of the way and the kids can have shade without running into an umbrella.  Over the past 10 years we've lived here I think we've gotten three because they keep braking due to the wind.  So, I knew I didn't want one of those again.  Since this umbrella would be in the flower bed I wouldn't have to worry about kids running into it, but I still needed to make sure it would withstand the winds that blow across the fields behind our house.  

I got my inspiration from Sara over at Pot Belly Bird HERE.  She lives in Chicago and has a rooftop patio so she needed an umbrella stand that could stand up to the windy city.  She went the extra step and added flowers to her cinder block umbrella stand.  One of these days I might get around to doing that.


This set up seemed like the perfect thing for my area and oh so easy to make.  I couldn't wait to get started but first I had to find the cinder blocks.  I thought I could just get them from Lowes or Home Depot.  And while they both had the regular 8x8x16 hollow cinder blocks, they did not have any 8x8x8 hollow cinder blocks.  They wouldn't do site to store with free shipping and I didn't feel like driving two hours to the nearest store which had them in stock.  I almost thought about abandoning this DIY project, but then I remembered we have a local building supply company about 20 minutes away.  I called and yes, they had exactly what I needed and better yet, it was cheaper than the other stores.  I purchased 2 of the 8x8x16 hollow cinder blocks and 3 of the 8x8x8 hollow cinder blocks for a grand total of $6.21.   


First up was to make a level base for the cinder blocks to set on.  I just used one of the concrete pavers that was used to weigh down the base of our old cantilever umbrella.


I layed down the 8x8x16 cinder block first, then added the 8x8x8 cinder block next to it.  I added the other 8x8x16 cinder block on top of the 8x8x8 block and half of the 8x8x16 block.


Then I added the remaining two 8x8x8 blocks on top of that, making sure they all lined up.


Then I placed my umbrella pole inside and filled around it with some rocks I had left over from the Kids Rock Garden project.


I wiggled the umbrella pole and everything felt nice and sturdy.  No fear of this thing getting blown over.


What a cute shady spot for my son to play in.


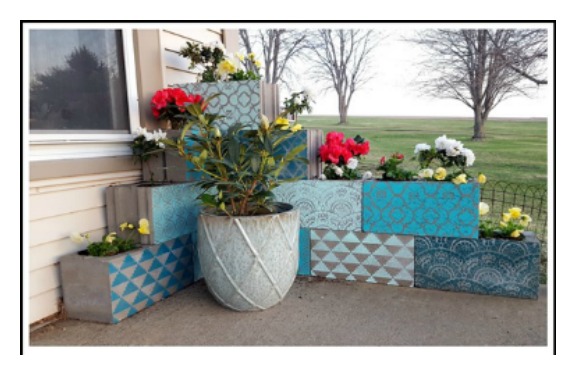
 And if I wanted to fancy up those plain ol' cinder blocks, I could always paint them like Bethany from Reality Day Dream did HERE.  The colors she used would even match my umbrella.


Be sure to check out my other patio updates:


Subscribe to CONTROLLING Craziness and get my blog updates via email.   Don't miss anymore posts, click HERE to get email updates.

Wednesday, May 31, 2017

Flower Bed Tot Spot

I'm such a fair weather worker.  First it was too cold to work outside, then it was too hot.  Last week, the temperature was in the 70's, just right to finally tackle some yard work.  

We have this flower bed in one corner of our patio and a couple of years ago our butterfly bush died which left this spot bare.  Well, it wasn't bare for long because it quickly became overgrown with weeds.  I didn't know what to do with it so I just left it.  Finally last summer, I tackled the weeds and laid some mulch but still didn't know what to plant there.  

Anyway, last week I finally figured out what to do.  I've been wanting to make our patio more kid friendly so the kids will play outside longer.  I had this old toddler bench that looked out of place next to the adult sized table and chairs on the patio, so I thought why not make a cute little tot spot in the flower bed.


First up was to do the remaining weeding.  My little guy decided it was more fun to help me than to ride his bike.  I'm not one to turn down free help, so I let him work.


Then I laid down the mulch.  I actually bought several bags of mulch from Lowes when it was on sale, that was over a month ago, and now I finally am getting around to using them.  Then I laid down the pavers.  The pavers I had sitting atop the base to our cantilever umbrella.  The umbrella broke last year and so these pavers were no longer needed.  Glad I could finally put them to good use.  The bench went on top of the pavers and I placed a potted tree behind the bench.  The tree started out as a sapling 2 years ago, it's a wonder that thing is still alive.  It looks good in this spot and the terra cotta colored pot matches the color of the pavers too.


I had my little guy test out the spot and soon realized, he needed a place to put his feet....


...so I added a little paver in the front...


...and now it's perfect.


Oh, and that big blue pinwheel does a nice job of hiding our utility line.


All in all, I'm pleased with this little tot spot.  I had all the items on hand and the mulch was the only thing I had purchased.  At $2 a bag, and I think I used 4 bags, it was an inexpensive upgrade for the patio.


Subscribe to CONTROLLING Craziness and get my blog updates via email.   Don't miss anymore posts, click HERE to get email updates.


And don't forget to follow me on FacebookTwitterGoogle+, and Pinterest.

Monday, June 6, 2016

Mulching Around

Back in April, I was very enthusiastic about getting my flower beds in shape.  I ordered 5 cubic yards of mulch and went to work.  Slowly day by day I made progress with weeding, digging and mulching, until May.   We had a very wet and rainy May so all the yard work I started in April, didn't get finished until recently.  Actually I'm not totally finished, I've saved the worst area for last and now that all the weeds have grown in, it just might wait until next year.  

Four years ago, I weeded and mulched my flower beds.  Unfortunately I didn't keep it up and my flower beds were back to looking like those before pictures.  You can check out that post HERE.  Luckily after all my days of hard work, the flower beds now look like those after pictures from four years ago too.  

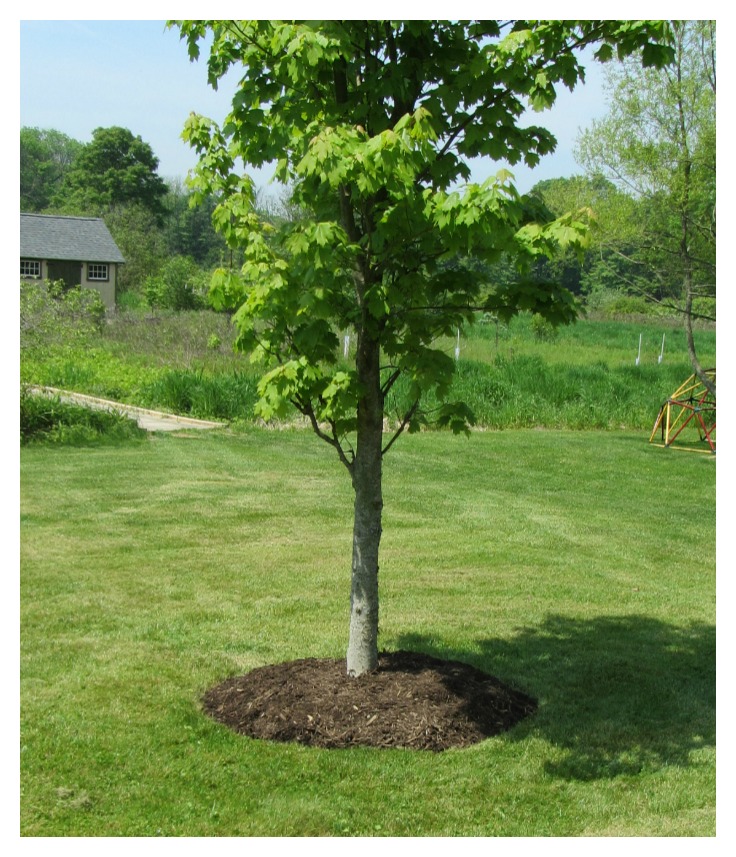
The one thing I never did was to mulch around the two trees we have in our back yard.  We just let the grass grow right up to the tree so there was some tall grass growing around the base of the tree since we didn't use the weed wacker with every mow.   Well, this year I took care of that and I love the way it looks, plus it makes it easier to mow around the trees.  
Here's the before and after:


The first thing I did was to dig a little trench around the tree.  I used a string loosely tied around the tree to mark off a circle with spray paint.   


Then I laid down some newspaper over the grass rather than digging up all the grass.  I've heard that will kill the grass/weeds underneath and prevent them from growing through the mulch.  It's been almost two weeks and no weeds yet.


And here it is all filled in with mulch:


Another before and after for you.  I like it so 'mulch' better.  Sorry for the bad pun, I couldn't help myself.


Subscribe to CONTROLLING Craziness and get my blog updates via email.   Don't miss anymore posts, click HERE to get email updates.


And don't forget to follow me on FacebookTwitterGoogle+, and Pinterest.

Wednesday, September 2, 2015

Sunflower House

I've thought of growing sunflowers for a couple of years.  I usually remember to plant them too late in the season, but not this year, or so I thought.  I bought the sunflower seeds and on the packet it says to plant them in May or June, after the last frost.  I planted them the first week in July, a little late but I was hoping they'd grow and bloom just fine.  I had planned on planting them in the backyard, right before our yard turns into the field of tall grass.  I figured the large flowers would be nice to look at and would cover up the tall grass growing out in the field.

Well, since I waited so late to plant them, the field was full of tall grass which I figured would block out the light and inhibit the growth of anything else.  I didn't want to plant the sunflowers in front of the field, that would be in our yard where we mow.  I was determined to grow sunflowers this year so I decided to plant some in our flower beds around the back patio.

My well meaning husband didn't know we had planted sunflowers and sprayed the flower beds with weed killer.  The sunflowers were dead, or so we thought.  Two sunflowers survived and were starting to grow taller and taller each day.  They still hadn't bloomed but I knew they would, it was just a matter of time.

Before they had a chance to bloom, my 12 year old son thought it would be fun to chop down things with a big stick.  Those sunflowers were the perfect thing to chop down.  Alas, we will have to wait until next year to plant our sunflowers.  I better mark my calendar now so I don't forget.  Oh, and after I plant them, I'm letting everyone in the house know so they won't spray them or chop them down.

Since I don't have any pictures of my sunflower border, I thought I'd share another fun way to grow sunflowers, and that's by making them into:

A SUNFLOWER HOUSE

Lasso The Moon shows off the sunflower house she made for her girls.  There are step by step pictures and even a video of what it looks like and all the fun the girls have playing in their secret spot.  Stop by her blog to check it out by clicking HERE.


San Juan Parent tells how to make a sunflower house HERE,
and for detailed instructions including what type of sunflowers to use, check out THIS SITE.


Subscribe to CONTROLLING Craziness and get my blog updates via email.   Don't miss anymore posts, click HERE to get email updates.


And don't forget to follow me on FacebookTwitterGoogle+, and Pinterest.

Saturday, May 26, 2012

Flower Bed Finale

Sorry to keep you in suspense about the flower beds, but I have been discouraged by weeds popping up and haven't done as much work as I could have.   That and I've been busy with end of the school year activities at my kids' schools.

I can't believe the nerve of those weeds.  I tried so hard to prevent them.  First I sprayed weed and grass killer down, then a couple of weeks later I weeded the flower beds.  After the beds were weed free (or so I thought), I sprinkled on some Preen.  Then mulched them and added more Preen.  So I was a bit peeved when I saw weeds poking their nasty little heads through my freshly mulched flower beds.  But since I spent a lot of time, not to mention money, on getting these flower beds into shape, I am determined to keep them weed free.  Here is my plan:  the kids play outside everyday in the summer anyway, so I'll just take a stroll around the flower beds to check for and eliminate any weeds I see.  I'll pluck them out or spray them with more weed killer depending on my mood and the severity of the weeds. 

OK, so it's taken me just over a month to get my flower beds weeded, pruned and mulched but I did, I really did it!  I was actually finished with the flower beds on Wednesday but then a downpour hit so I didn't get to take the final pictures.  So without further ado, here are the 11 flower bed before and after shots.  Prepare for picture overload.

1.  West side of driveway
I neglected to take pictures when I started this project so I don't have a before shot.
Here is what it looks like now from the top of the driveway looking down.
And from the bottom of the driveway looking up.

Tuesday, May 22, 2012

The Last Of The Flower Beds

OK, here it is, the final flower bed.
Here is what it looked like before:

 and after:

Monday, May 21, 2012

Yard Work Attire, A Tire, I'm Tired

In case you are wondering what I wear when I do my yard work, here's my yard work attire:

Rubber boots so they can easily be cleaned of dirt and grass:
 I bought these several years ago before rain boots were all the rage and there were lots of styles.  I think I got these online from Walmart and this was the cutest style they had.

Wednesday, May 16, 2012

Another Flower Bed Done!

We had this very week infested flower bed on the west side of the patio.  And I have finally tackled it.
Here is what it looked like before:

click below to find out how much better it looks like now.

Tuesday, May 15, 2012

Patio Flower Beds - update

I planted some hostas so now the patio flower beds are looking a little less bare.

Here's a before:
 And a bunch of after shots:

Thursday, May 3, 2012

Patio Flower Beds - part 4

Welcome to part 4 of getting my patio flower beds under control.  If you want to see how much I've done, be sure to check out part 1, part 2, and part 3.

This is the end of working on my patio flower beds and I only have 2 more flower beds to go, so I'm in the home stretch.  Whoo hoo!

Here's a series of before and after shots.  Just look at all those weeds, overgrown ivy and even some extra little trees that started to grow in the before shots:
after:

Tuesday, May 1, 2012

Patio Flower Beds - part 3

Getting more and more done on these patio flower beds.  You can read about part 1 and part 2 HERE.
I'm getting so close to the end of my flower bed project.  Just a little section of the patio flower beds left and then 2 more flower beds to do and I'll be done.   I wanted to have it done before May but that's obviously not going to happen.   I'll revise my plan and hope to be done this week.  OK, maybe next week at the latest, I promise.

Here's some before shots to remind you of how bad it was.  Over grown bushes and out of control ivy.  We even had a butterfly bush start growing in three spots - a seed must have spread from the butterfly bush of the flower bed I have yet to tackle.

Before:

That purple bush on the right is one of the prickly bushes that needs to be removed.

During:

Monday, April 30, 2012

Patio Flower Beds - part 2

Still working on the flower beds around my patio.  You can check out part 1 HERE

Here are some before shots:

Thursday, April 26, 2012

Front Flower Beds

I'm still plugging away at my patio flower beds, getting a little bit done each day.  I realized I showed you the side flower beds but forgot to show you the front flower beds. 

Here is the front east flower bed before:

Wednesday, April 25, 2012

Patio Flower Beds - part 1

Yesterday was sunny, chilly and windy, but I managed to finish off one section of the patio flower beds.  I am slowing working my way around the house.  I optimistically thought this project of weeding, pruning and mulching the flower beds would take a week.  Now that it's been a week, I am revising my deadline and hoping to get it done by May.

I titled this post:  Patio Flower Beds - part 1.
I am not sure how many parts to this story there will be, but I'll be sure to keep you posted as I go along.
This part took a while but the results are pretty dramatic in my opinion.  Plus seeing before and after pictures keeps me motivated to keep on working.

Here's what the area looked like before.  Weeds, overgrown bushes, ivy climbing up underneath the siding of the house:

 And now for the after:

Tuesday, April 24, 2012

Flower Pots

It was a cold rainy day around here yesterday and I didn't feel like working on the flower beds.  Not to mention the weed infested and overgrown patio flower beds are a bit overwhelming.  I need a bright, warm, sunny day to tackle those. 


So instead, I worked on the flower pots I have sitting on my front porch.  I have some large pots sitting on either side of our front door.   Right before spring, I posted about these tiered flower planters by Amy at Positively Splendid.


I liked the idea so I made a two tiered planter for my porch.  Mine is not nearly as colorful and cheerful looking as Amy's but I worked with what I had and it matches the rest of our earth toned house.  My front porch looked like the end of last summer.